GINGERBREAD COOKIES

After many, many years of making gingerbread people for Christmas – they are the place cards at our Christmas dinner table – I have finally perfected the recipe: a little bit from my grandmother Boxer, a dash from a vintage 1940’s McCall’s special holiday cookie insert and just a hint of Martha. Oh, and I added the use of fresh ginger instead of ground as it was all I had on hand last year and WOW! what a difference!
These take a while so I find it’s best to make the dough the night (or several nights) before you plan to bake and then give yourself an entire afternoon to roll, cut, bake and decorate – these really are just too good to be rushed.
Enjoy – and if you do make them, why not send it photos of your finished product?
SIFT TOGETHER:
3 cups all purpose flour
1 tsp salt
¼ tsp baking powder
½ tsp baking soda
3 tsp ground cinnamon
1 tsp ground cloves
1 teaspoon finely ground black pepper (this is the “hint of Martha” – hope she doesn’t mind … Hi Martha!)
CREAM TOGETHER: ½ cup brown sugar
½ cup unsalted butter
THEN ADD
1 large egg
½ cup molasses (unsulfured is best)
3 teaspoons freshly grated ginger (here’s a hint: keep your fresh gingerroot in the freezer – it is then super-easy to grate!)
Beat until fully incorporated and then slowly add the dry to the wet until combined, but be careful not to over-mix or you’ll risk tough cookies.
Bring in to a ball, wrap in wax paper and chill in the fridge at least an hour or overnight
Preheat your oven to 350 degrees.
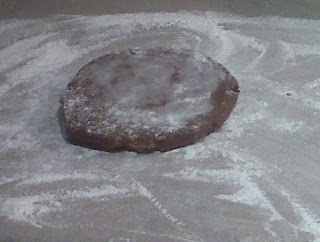
Roll out the dough on a lightly floured surface to about ¼ inch thick (honestly, I am just typing that measurement knowing full well that I haven’t got a clue what a ¼ inch thick really is, so use your judgment – not too thin - they will BURN!- and not too thick - they won’t cook in the middle, YUCK!) and cut out your shapes – girls, boys, stars, bells, angels, whatever.
Here are some great collections of cutters, which is a more cost-effective way to go than buying individually.
Harold's Kitchen 12-Piece Holiday Cookie Cutter Set
Roshco 100-Piece Plastic Cookie Cutter Set
Wilton Animal Pals 50-Piece Cutter Set
Dog Bone Cookie Cutters Set of 7
Carefully lift to parchment lined baking sheets (this step is KEY – if you have a Silpat Nonstick Silicone Baking Mat
Refrigerate before baking 10 to 15 minutes (again, this is KEY – I once didn’t do the refrigeration step and well, that was the last time I skipped it).
Bake for 10 to 12 minutes – when your kitchen starts to smell delicious, that’s a good indication that they are done – but be careful, these critters can burn quite easily and that’s just wrong..
Carefully remove the cookies from the baking sheets and place on cooling racks - if you're doing as big a batch as we did you might find something like this Wilton Excelle Elite 3-Tier Cooling Rack
 The sous chefs. The blur on the left is Nub-Nub, then Maggie, Guacamole, Decker (the snuggle-puggle), and Scout.
Cool until you are ready to decorate – I use royal icing (recipe to follow) and add sparkle with dragées, (which you can get usually at a grocery store, or here for $5.95 for: regular sized silver Dragees, 4 oz.
I also tie fun ribbons through some to hang on the tree, well I did before pup Scout came to live with me, or to add a personal touch as a gift tag. The important thing is to have FUN with them!
ROYAL ICING:
2 egg whites beaten until stiff
Add 4 cups of icing or confectioners sugar and either the juice from a lemon or other flavouring, like peppermint – beat until you get the right consistency and spoon in to your piping bag – colour as desired.


1 comment:
Oh...I can't wait! I haven't tried the new improved version yet. The old one was soooo great!
xoxo MOI
Post a Comment